
Science is meant to be interactive! That’s exactly why I tried out these three weather experiments with a class of first to fifth graders after teaching them more about severe weather events and safety. These intelligent and curious students were very engaged and I loved hearing their thoughts on each experiment. (I’ve included some suggestions on what I would change or add to the experiments for the next time!)
#1 Thunderstorm in a Box (Thunderstorm Development)
Use: shoe-box size clear container, red food coloring, one tray blue-dyed ice cubes, lukewarm water (to fill container)
Set out container filled with lukewarm water and place a blue cold ice cube in one side of container. Then, drop a couple drops of red food coloring in other side of container. Add more red drops to examine results.
What it shows: The water is a fluid, as is air in the atmosphere. Due to convection, the warm red water representing the warm, unstable air rises, while the cold blue water representing the cold air mass sinks. The cold air brought in by a cold front forces the warm air to rise. When the colors mix to create purple, you see a thunderstorm cumulonimbus cloud form with a somewhat-overshooting top.
**This demonstration did not work the best for me because the water was too warm and the ice cubes began melting and spreading throughout the container. Make sure to add just one ice cube at first, and to use lukewarm water. I also used two separate containers so the kids wouldn’t have to all crowd around one!
#2 Balloon Hair (Static Electricity)
Use: Balloons 
The kids (and teacher-at right) loved this one, and it’s SO simple! All you need to do is blow up and tie as many balloons as you can. BE WARNED: It’s helpful to show a quick demo before throwing the balloons out to the crowd of excited kids!
Ask for a volunteer. Rub the balloon on his or her hair to observe how the hair stands up and attaches to the balloon when you move it slightly away from their head.
What it shows: When you rub a balloon on the hair, you are putting tiny negative charges all over it. Because these charges are all the same, the strands of hair attempt to move away from one another rather than join together. If you move the same balloon (after having been rubbed on hair) near the ceiling, you will see that it becomes attracted to the ceiling and actually sticks to it. This is because the balloon and the ceiling have opposite charges. Lightning acts in a similar way, where it is attracted to the ground due to opposite charge. This is because of static electricity! In dry air, we notice greater effects of static electricity because there are less water particles in the air to help electrons move off of us…so a bigger charge is built up!
#3 Tornado Vortex (Tornado Formation)
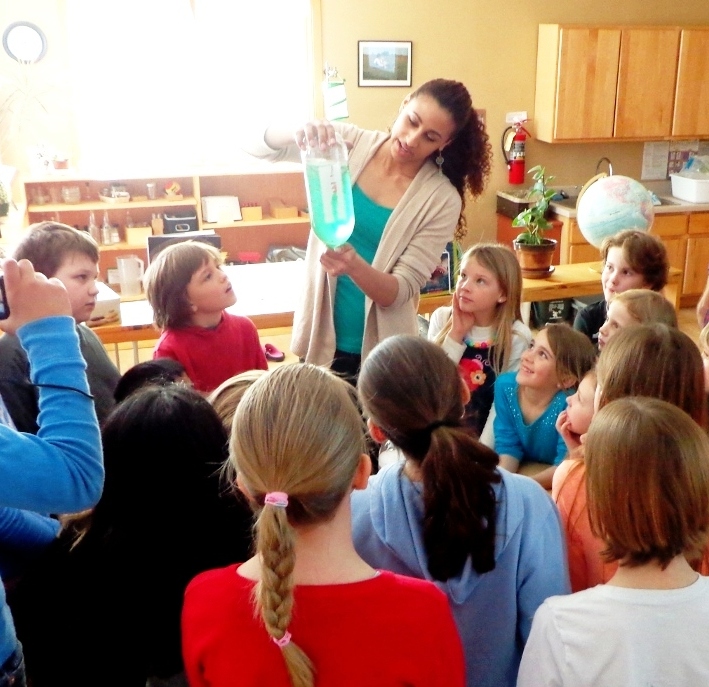 Use: drained and rinsed 1-liter bottle of pop, confetti pieces, lukewarm water (to fill bottle), dishwashing liquid
Fill the bottle a little over three-fourths full of water and add in just a couple drops of dishwashing liquid. The ratio of dishwashing liquid to water took some experimenting before I went in to the school, so I would suggest testing it out before demonstrating. I added in confetti pieces to make it a bit more exciting! Glitter, food coloring (only need a couple drops so it’s not too dark to see through), or colored lamp oil (would make the vortex stand out more) are other fun extras you can try adding to your bottle. Swirl the bottle upside-down bottle in a fast, circular motion so that its contents spin into a vortex. Keep in mind that tornadoes almost always rotate counterclockwise (cyclonic rotation) in the Northern Hemisphere.
What it shows: Like in an actual tornado, a vortex forms (lucky for us, it’s in a bottle!). Centripetal force, which directs the water inward toward its circular path, allows the water to spin quickly around the center of the vortex. Wind shear plays a major role in the formation of tornadoes. The person swirling the bottle is actually the force causing the water (wind) to rotate and create a vortex. You can even mention the three ingredients needed for a tornado to form: moisture, lift, and, instability!
**I used two separate bottles so all the kids could have a turn. The sunlight from the window really helped to show the vortex more clearly! You could connect the bottles mouth-to-mouth with duct tape (very tightly wrapped) to see the vortex transfer from one to another, but I’ve seen these make a big mess unless you use a Tornado Tube bottle connector
Have a blast!
Truly,
Tash

Leave a comment